Finally had some time to work on the boat again so I decided to tackle the keel bulb. For a crucible I used the bottom of a 55 gallon drum with a spout on the side. I then used an engine lift and attached chains slightly off center to the top of the crucible. To melt the lead, we put it on a propane crab (turkey) cooker. I also had a propane weed burner hand wand I used to preheat the molds and to heat the lead from the top. It took about 15 minutes to melt the 250 lbs of lead for each half of the keel. Once the lead was melted, we ever so slowly jacked the engine hoist which tipped the crucible pouring lead out the spout and into the mold. Again, we made sure we had lots of protection and respirators. Also we had a bit of a breeze and were able to always stay upwind. I was kind of nervous about the whole process...but it actually went remarkably smooth!

The keel came out of the molds and looked prettty nice. This picture shows the top and bottom halves put together. (but it's actually upside down here) The weight came out to 550 pounds...which, suprisingly, was what I was hoping it would be! I love it when a plan comes together!

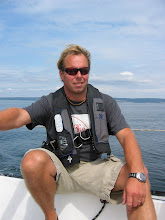
Picture of a very happy me getting ready to chisel off the ridge where the two halves meet. Later I faired the bulb with compound...but it didnt need much.


 After bolting on the bulb, I made an epoxy fillet which I then reinforced with glass and carbon fiber.


 For lifelines, I decided to go with Amsteel by Samson. Its super tough stuff and easy to work with. Here's my eye splices at the back of the boat. They are then lashed to the rear stanchion. This way I can easily adjust the tension of the lifelines.


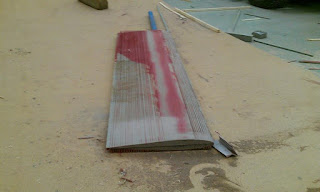 I used the same technique for shaping this blank as I had the pink foam one. I used a template to trace the shape of the NACA foil on the end of the blank. Then I repeatedly ran it through the table saw adjusting the blade each time for the correct depth to correspond to the foil shape. I then sprayed is red and sanded down to the red refference lines that were made. Again, this worked really well. Just a bit awkward with the weight of the stainless post on one end.
 To paint the hull, I used Interlux Perfection. It is pretty awesome stuff. Unlike the topside paint, it is just a single part paint. I applied it using a foam rubber roller. It took me a few coats before I really figured the stuff out. The key is to do only a couple square feet at a time. After applying a couple square feet, I learned that by rolling it again super lightly that this would "tip" the paint and cause it to lay down nice and flat. Then, whatever you do, dont try go back and fix anything, just move to the next section...and be quick about it or the sections won't blend! I ended up with at least 5 coats. The only problem is this stuff is so glossy and shiny that any little ripple or bump is easy to see and I found myself wishing I'd spent a few more weeks fairing the hull! But overall, it looks really nice. Unless you get within a foot of it and really examine it, it looks like it was sprayed. And hopefully out on the water, no one is ever that close to the boat!