Friday, November 20, 2009

More Progress


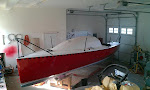
Got a bit more done today. Most of it what I got accomplished is below deck. Where the cockpit
floor panels meet the cockpit side panels, a bit of work had to be done to strengthen the joint. First I had to sand the sharp edge where the two surfaces met smooth and give it a nice rounded profile. Then I glassed it with 4" tape, and then a second layer of 6" tape. (The flash from my camera makes it look like I've got a lot of dry spots in the tape--they aren't really there..really!) I also added a couple layers of tape around the base and top of the rudder box. I also added a strip on the top edge of starboard hull and sanded it at the correct angle to receive the deck. Lastly I cut the remaining cockpit deck stringers, notched them and dry fit them into postion. If I get time to work on the boat next week, I should be able to start decking the cockpit area.

Wednesday, November 18, 2009

Deck Prep


I'm a few steps away from putting on cockpit deck (have to do reinforcement of the cockpit floor seams, rudder box, etc) But since I was waiting for some epoxy to cure, I started prepping the port side for deck. All the clamps are holding a strip along the top of the hull. This strip is to beef up the hull/deck joint and give me more area to glue to. I so love all the clamps--they just look so very..boat builder like! Plus, I had to use my sanding block to shape the strip to the proper deck angle--which also felt pretty craftsman like! The forward part of the cockpit deck I foresee being abused by my crew. This is where everyone jumps up to go forward and hike. To make it "Dan Proof" (and "me proof") I dry-fitted a couple 3/8" ply stringers that will lay under the 3/8" deck. The aft deck won't be walked on as much and also narrows so I will run just one stringer in that section. Note: All the cardboard covering the cockpit deck area is to keep in heat. I have a lot of stuff below the cockpit curing so I put a heater below and then made a "tent" with the cardboard. Well, tomorrow is supposed to be another rainy, windy day here on Whidbey, so maybe I'll get to play inside again and put in a few more hours on the project.

She's Got A Sweet Rear End!


I'm really happy with how the rudder project is turning out. By having the slot, it just makes everything look a lot cleaner. The middle picture shows sort of a mock up of the rudder assembly (I guess I should have flipped this picture around) Has the rudder at one end of the carbon cassette, and that stick on the other side represents a tiller that will attach to the top of the rudder post. The whole thing slides into the slot. The rudder ends up below the hull and is free to pivot. The carbon fiber part locks into the slot, and the tiller will attach to the top. The whole thing will be able to quickly pop in and out for trailering, cleaning, etc. The last pic shows the cassette in place. (There will still be another plate that goes on top of thisto clean it up and lock it in place) Note: You may notice drywall screws visible in certain pictures. These aren't permanent, they are just to hold things in position until the epoxy cures, then I'll take them back out.

Cool Carbon Part


I could have built this part out of regular glass, but after making the cool carbon tube, I figured I'd continue with my carbon dreams. So this little thing is the cassette that will slip into the rudder slot. The rudder will be below it, the rudder post will run through it, and the tiller will be at the top of it. The shop has been sort of cool lately, so I decided to use the oven again for curing this particular part. Well, I'm now banned from using the oven. Apparently, some minute amount of epoxy dripped into the bottom of the oven and made a little plastic-esc smell when Denise made cookies after I used it as an autoclave. So now, unless it's something I can eat, it doesn't go in her oven. Seems a bit harsh to me because honestly, I really didn't think the cookies tasted like epoxy--can't figure what the big fuss was. Oh well, the parts done now, and maybe I can use my neighbor Daves oven in the future.

Crikey! There's A Hole In My Boat!


Well, that was a difficult thing to do. Not physically, that part was surprisingly easy--she cuts like butter with the right tool. It's just sort of tough emotionally to cut a hole in a perfectly good hull that you spent so much time trying to make perfectly smooth. But the good news is I got over the trama pretty quickly, and made a box for the rudder cassette to slip into. It runs from the bottom of the hull right up through the cockpit floor (which I also installed today) This box is water tight--at least it's supposed to be. But it shouldn't get much water in it any way as the waterline is pretty much even with the bottom of the hull at this point.

Sunday, November 8, 2009

Totally Tubular!


So I've been sick the past couple days and haven't gone flying, but I haven't felt like doing much of anything. I'm feeling mostly human again today so I thought I'd make a carbon tube. This will be the tube in the rudder casette that the stainless rudder post will pass through. So I used a 2' length of PVC as a mandrel. I put vasoline on it and then a layer of 4mil plastic. Next I did 2 layers of carbon. Then I wrapped it gently with electrical tape and let it cure in the oven at 130 degree. After 40 minutes, it was cured. The PVC slid out easily. Next, I wrapped a couple more layers of carbon, then 5 layers of glass (as a core), then 3 more layers of carbon. Then I wrapped it really tightly with electrical tape that I had drilled holes in. As I stretched the electrical tape around, it forced excess resin out the hundereds of holes. I wiped the whole thing with paper towels, then back into the oven for 40 minutes. The thing turned out really nice. It is super stiff and strong and should work great. It was also a good way to get some more experience working with CF.

Thursday, November 5, 2009

Decisions, Decisions!

Ok, so if you've never built a project from scratch with no instructions at all, there's something you should know. One spends a ton of time just staring at the project trying to figure what to do next and how to do it. Sometimes I'll just stare for 20 minutes or more running dozens of senarios through my head. Trying to figure loads, strength, asthetics, all these variables. My latest problem I'm contemplating is the rudder. Transom hung? OR mounted under the hull. If I go with a rudder hung off the transom, it will be a cassette type so I can easily pull it up for trailoring, or cleaning off sea grass. The negative is that the transom has this sweet slope to it and I'd have to build out some sort of structure to mount the rudder on. I'm afraid this would clutter the look of the boats rear end. If I go with a rudder mounted under the hull, the back of the boat stays clean, and I can mount the outboard bracket in the center. I think this will look nicer. The problem with this is it will be tougher to remove the rudder for trailoring. (Someone will have to either get wet, or we need to use the lift) Does anyone have any input on this? The good thing is that whatever I choose, it wouldn't be hard to change over to something different later on. Just wondering what other people think.

Enter The Matrix


Today I got the rear cockpit floor panel cut out. The grid system that I'm making for this panel is made of 3/8" ply and has 2 for/aft stringers, and 2 sideways stringers. This matrix of stringers is the biggest grid so far. It's a lot of fun making these grids. They are so slick the way the notches lock together. And when they are all filleted and taped, the panels seem very strong, stiff, and light. The last picture is of the panel with the grid filleted and weighted down on the floor (to ensure a flat cockpit floor).

Wednesday, November 4, 2009

Cockpit Floor


The cockpit floor I'm making out of 3/8" ply. I'm also making a grid for it out of 3/8" and 1/4" ply. I know how chaotic it can be in my cockpits so I want the floor to be pretty tough. The whole boat has to be built "Dan proof". Dan is one of my regular crew and he's a big strong guy--like 8 feet tall! He will be a key player in keeping this boat on its feet, but he doesn't always move around gracefully (sorry Dan, but you're no ballerina :)) and I don't wan't him suddenly disappearing through the floor either! It turned out strong-and fairly light. I think once it is all bonded, and glassed it should hold up well!

Hey Look--A Cockpit!


Well, sort of a cockpit!Pictures of the side panels laying in position. Suddenly the cockpit sort of takes on a bit of shape. Its nice to see actual lines rather than having to imagine. Next, I'll work on the floor panels and get them ready. But before I can glue anything in position, I have to finish up below the cockpit floor--adding some reinforcement tape and painting everthing in epoxy. I guess I could do this later as there is room below to work but it will be easier while it's still open.

.

Cockpit Side Panels


I decided to make these panels out of 1/4" to save weight since they are vertical panels and won't be walked on. Then I remembered how I tend to sail boats in some pretty unusual attitudes and that these panels may indeed be walked on. So I added a grid system since it seemed to work so good on the berth panels. Notice the panels are curing in the house--yep, Denise has been so kind as to let me bring stuff in to cure at 70 degrees rather than 50 degrees in the shop. It goes a lot faster, plus the whole family can enjoy my handywork (and partially cured epoxy actually chips off the floor quite easily--so no worries!)

A Place to Lay My Head- Quarter Berths


Actually, it will be where my legs and feet will lay. The quarter berths extend 4 feet under the cockpit. First I painted the inside of these compartments with epoxy, and added another layer of carbon to the stringer that runs through this area. The stringer now has 3 layers of 6oz carbon and is super stiff. I was amazed how much that last layer stiffened things. I will be adding a 3rd layer to the rest of the carbon stringers as well. Then I cut out the panels from 1/4 inch ply. To add strength, I made a grid system from more 1/4" ply and glued and glassed it to the bottom of the panels. Now they are still really light but super stiff. The last pic shows the panels glued into position. In addition to serving as part of the quarter berths, these also brace the hull side panels--giving more rigidity and stiffness. They also form watertight flotation compartments.

Thursday, October 8, 2009

V-berth Panels


Tonight I got the panels trimmed so that they all fit nice and snug. I also built an access hatch into the center so that I can get to the storage area under the v-berth. Next step is to paint the bottoms of the panels with epoxy and then glue them into position.

Oops!


When I made this bulkhead, I decided to make a couple lightening holes to save weight. Well, it turns out I was a bit premature. When I gave it more thought, I decided I don't want holes because I want as many air/water tight compartments as possible. That way if the hull is ever compromised, or we get knocked down and get water coming inside, we have more flotation to give us time to take care of things. So I ended up making a couple plug pieces to fill the holes once again. Now when the v-berth is finished, the forward part will be a seperate airtight compartment.

Floor Panels!


Here's some of the rough cut panels that will be installed in the v-berth. I did this yesterday so this means my blog is now caught up. I promise I'll never get behind on my blog again..yeah right!! I will however try to stay more up to date on it since I was surprised how many people actually check it. Hopefully the progress will be more steady now too since the kids are back in school, and sailing season is slowed down. Plus I was inspired to get going on it again since David (the original builder/concept guy) came by and gave lots of compliments on the project--seems I thrive on the whole flattery thing!

Installing the Beams


Some pics of the I-beams installed in the v-berth area. I also glued in some ply strips along the bulkheads to give me more area for gluing on the floor panels.

I-Beams


To give strength to the v-berth area without adding weight, I have built three I-beams. These things are so cool. I used 5mm luan for the webbing and then used 1/4" ply for the caps. I glued these, and then laminated the web on both sides with 6 oz cloth. They turned out super strong, and weigh less than a pound each. Now I should be able to use 1/4 inch ply for the v-berth "floor"

First Interior Section Complete!


I completed the my first section of the boat's interior. Its the area in front of the crash bulkhead. I painted the interior with epoxy so it's water proof. Then I made a "floor" out of 5mm luan which I glued and taped in. So now I have a nice little cubby area in the bow with a water tight "crash" section below.

Making it Stiffer!


In addition to the carbon fiber stringers running along the bottom, I've also added a couple of plywood stringers running lengthwise along the keel joint. This is to stiffen the hull panels but it also creates a sort of backbone for the boat making the whole boat stronger and stiffer along the longitudinal. I also got the transom re-installed and glued into postition. The transom is tied into the plywood stringers with a couple triangle shaped gussets for added strength.

Carbon!!


Finally, the carbon fiber! So the stringers on the bottom that will take the most pressure and beating I have decided to use carbon on for extra stiffness. To start with, I have gone with 2 layers of 6 oz cloth. The carbon actually wets out and lays down really nice. With the carbon on the stringers, they become really stiff. It like having a couple steel bars running the length of the boat!